Showing posts with label autumn. Show all posts

Thursday, January 3, 2013

My 13 Goals for 2013

I love goals. I need goals. Without them, I start a project, then leave halfway through to begin another. When I have a goal or deadline, I work toward it, enjoying the pleasant feeling of accomplishment.

So, I have set 13 goals to accomplish in 2013! Some are personal, some are business-related. (Thanks, Regina, for the idea!)

Build myself as a Designer:

1. Design something new every week in January (for Spring), March (for Summer), June (for Fall), and September (for Winter). I want to produce those designs the following month, as a seasonal clothing collection.


2. Launch Collections:
     - Spring Collection in February or March (2-3 pieces).
     - Summer Collection in April or May.
     - Fall Collection in July or August.
     - Winter Collection in October or November.
     - Bridal & Prom Collection in September or October.

Expand my Etsy Shop:

3. Have a full page of listings (24) in the Bridal Accessories section (15 more). Preferably by February.

4. Have 20 listings in the Dresses section (7 more) Preferably by May.

5. Have a full page of listings (24) in the Dresses section (4 additional). Preferably by October.

6. Have 8 listings in the Wedding Gowns section (4 more). Preferably by February.

7. Have 50 coffee sleeves in inventory. Preferably by November.

8. Don't buy any cotton fabrics. Use fabric stash to create new items (non-clothing).

Live Well:

9. Read through the Bible in a year. I've done this before, and it's wonderful! My church is doing it together, so I'm doubly excited!

10. Low-Carb Diet. Intensive for 1-2 months, moderate for the rest of the year.
My husband is pre-diabetic, so we need to regulate his blood sugar naturally.
I want to get good at cooking and baking low-carb. Hopefully we'll both loose weight, too!

11. Try 2 new recipes every month. I enjoy this, but I don't do it often enough.

12. Read at least one book each month. This is how I de-stress. Very important!

13. Enjoy each month and document with photos. I love nature, changing seasons, holidays! I want to make a point of enjoying them, not just living through them.


What are your goals or ambitions for 2013? Please share!


Wednesday, November 9, 2011

Amazing Stuffing

Oh. my. goodness.

I LOVE stuffing.

Seriously, it's the best part about Thanksgiving dinner.

And my favorite leftover . . . ever!

With everyone talking about November and the upcoming fattening holiday, I have been craving stuffing.


I recently purchased a Depression Era cookbook at a consignment shop, and I love it! So many recipes I want to try.

I actually read through the entire cookbook and marked recipes I want to try. Guess which recipe was at the top of my to-do list?

STUFFING.

The cookbook called it "Wild Rice Dressing", or something like that.

Rice in stuffing? Never thought of that, but it sounded good.

And it was good!!!


I read this recipe about 20 times over 3 days, and perused my Betty Crocker cookbook's version of stuffing, as well.

I came up with my own version of the most amazing stuffing ever!!!


FAITH'S AMAZING STUFFING (as usual, measurements are approximate)

2 cups cooked rice (I used brown)
1/2 to 1 loaf bread, cubed and dried (oven toasted works, too!)
4 stalks celery, chopped
1/2 large or 1 small/medium onion, chopped
1 apple, sliced or chopped (optional, but tasty!)
1/2 cup butter (or more, if you want it really moist--but 1 cup was too much!)
1.5 to 2 cups chicken stock (or water and bouillon cubes)
1-2 Tbsp parsley
1 tsp sage
1 tsp thyme
1-2 tsp salt (to taste)
few dashes pepper (to taste)
handful of cranberries (optional)

1) While cooking rice and toasting bread, saute celery, apples, and onion in butter (in a medium-large saucepan).

2) When soft, add chicken stock, spices, and cranberries. Cook until bubbly. 

3) Remove from heat (or turn off heat) and add everything else. Mix carefully and thoroughly.

4) Transfer to casserole dish (at least 2 quart), cover, and bake until warm or longer. I did about 2 hours at 200 degrees. 20-30 minutes at 350 would probably do the trick.

Please, enjoy this as much as I did/am!!!

Wednesday, October 26, 2011

Pumpkin cookies!

Pumpkins and fall go together like peanut butter and jelly or . . . any other twin metaphor. So, of course, since the day we brought in 44 pumpkins from the garden a few weeks ago, I've been dying to make yummy pumpkin cookies!!

Here's the recipe I tried, and pictures of my process :)

Pumpkin Drop Cookies

1 cup butter, softened
1/2 cup sugar
1/2 cup packed brown sugar
1 egg
1 cup canned pumpkin
2 teaspoons vanilla extract
2 cups all-purpose flour
1 teaspoon baking powder
1 teaspoon baking soda
1 teaspoon ground cinnamon (instead, I recommend 2 teaspoons cinnamon, plus 1/2-1 teaspoon each allspice, nutmeg, & cloves)
1/2 teaspoon salt
3/4 cup chopped pecans (optional)


Directions:

In a large bowl, cream butter and sugars. 

Beat in egg. Add pumpkin and vanilla.


Combine the flour, baking powder, baking soda, cinnamon (and other spices, if you prefer) and salt; gradually add to creamed mixture. (Stir in pecans.)


Drop by rounded teaspoonfuls 2 in. apart onto ungreased baking sheets.  
Bake at 350° for 11-13 minutes or until edges are lightly browned.
Remove to wire racks to cool.
I recommend putting paper towels under the cooling rack,
or your counter ends up looking like this!

We (my husband Parker and I) tried this recipe with several different add-ins. After tasting with and without frosting, here are the results:
Dried cranberries: Yummy w/ & w/o frosting
Cranberries & chocolate chips: Amazing! either way
Chocolate chips: Good, especially with frosting
Butterscotch chips: THE BEST! w/ & w/o (I love them even more with frosting, Parker likes them better without)
Chocolate and Butterscotch chips: EVEN BETTER! We didn't do this, but we ate pieces of the 2 cookies together and we wish we had added both!
Extra spice: like I recommend above, they are so much better with extra spices (and any add-ins)

Penuche Frosting
3 tablespoons brown sugar
2 tablespoons butter
3 tablespoons milk
1-3/4 to 2 cups confectioners' sugar

Directions:
For frosting, in a small saucepan, bring brown sugar and butter to a
boil. 

Cook and stir over medium heat for 1 minute. 
Remove from the heat; cool for 10 minutes. (*Be sure you do this! I didn't, and it made it much more difficult!)

Transfer to a large bowl; beat in milk.
Beat in enough confectioners' sugar to achieve spreading consistency.


Enjoy these cookies! Please tell me all about your baking experience!!!

Happy Baking!


Tuesday, October 11, 2011

Quilted Tote Bags!

I'm happy to announce that I now have some cotton tote bags in my Etsy shop!!!!

These have been in the works for about a month, in between other projects and when I wanted to keep my hands busy (usually during movies with my husband) by cutting quilt pieces :) I'm so excited to list them, finally! My younger sister was home from college this weekend, so she modeled everything for me!

I learned how to quilt in middle school, when I did it for 4-H one year. I knew it was for me :) After that, I made a quilted-front pillow from fabric from my grandma's stash. Still my favorite pillow!

During my freshman and sophomore years in high school, I made purses for myself every few weeks--sometimes every week, just because I love to sew! I made my first quilted/pieced-front purse as a sophomore, and within a week a friend asked me to make one for her, too!

Every time I make a quilted purse, people love it. So, what was I going to do with a bunch of fabric scraps too small to use for skirts (or already used for skirt panels and I didn't want to make too many of the same design!)? Quilted purses, of course!

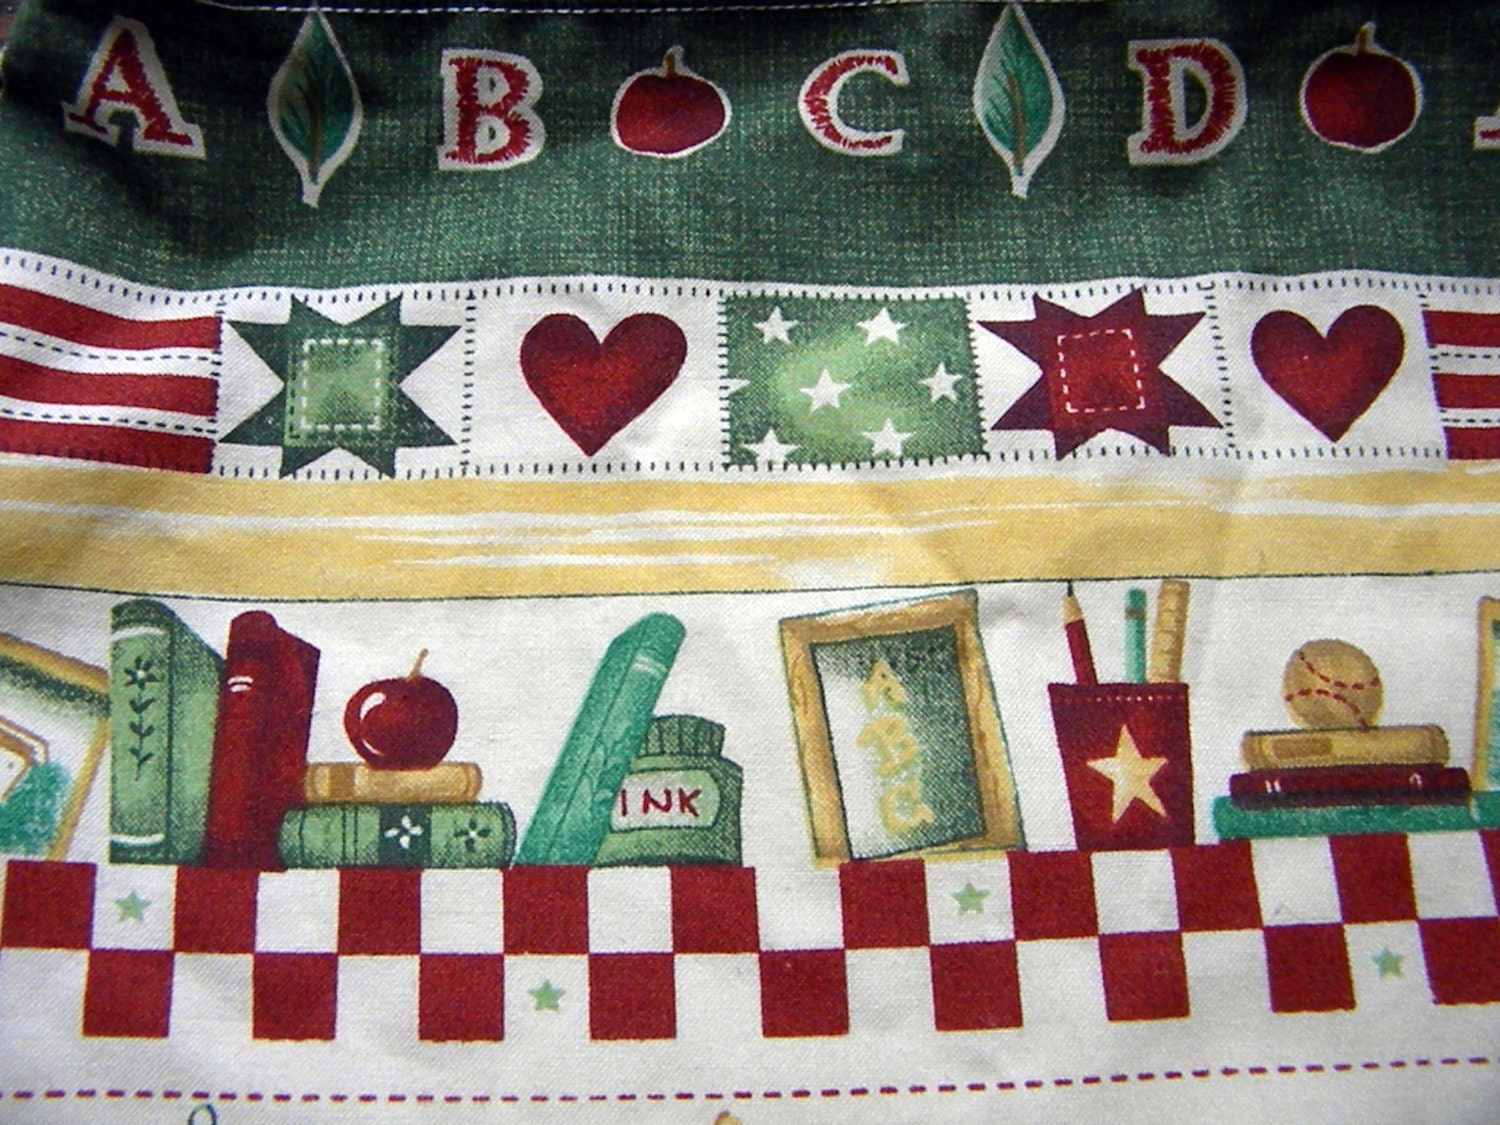
Tote #1:

First, the non-quilted purse--still made of vintage fabric, though! I call it the ABC School tote (click on name for listing). What would you name it?

It has birdhouses, school books/supplies, and letters on it :)


Front and back are the same, lined with white fabric.

Sadly, I only had enough fabric to make one of these.


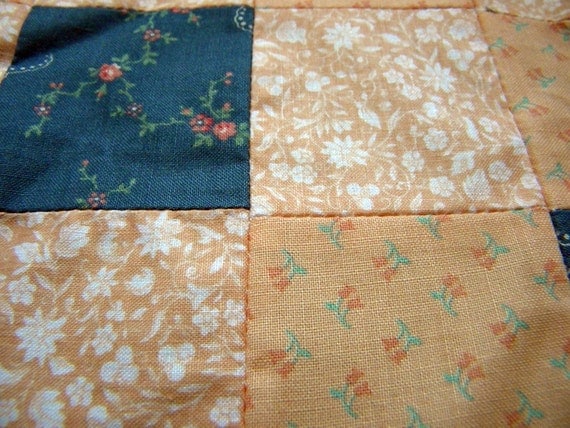
Tote #2: (click here for listing)

This one is so pretty and delicate in blue and light orange! I love it!

The first fabrics I experimented with for these totes, the squares are in an interesting design.

Backed with the beautiful blue calico fabric and lined with vintage ivory.

This bag is perfect for library books, sewing supplies, or as a small reusable grocery bag! It's 12 inches square.

I have two more of these ready to sew. That makes 3!


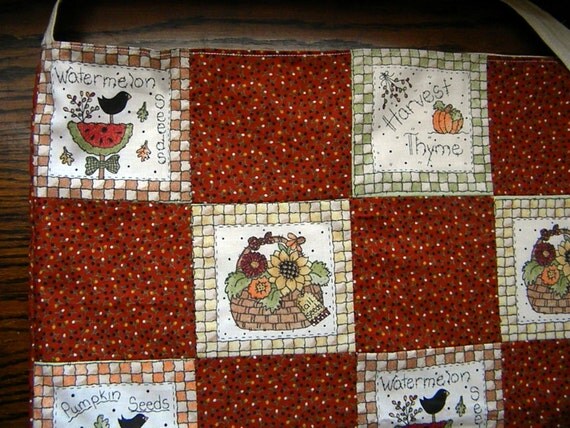
Tote #3: (click here for listing)

This fabric pairing was a crazy idea, but I think it works :)

I found fabric that had 4" squares all over it, each square filled with a vegetable/fruit, spice, or flower basket. It was just calling to be cut up and turned into a quilted tote!

The burnt orange dot fabric is a strange match, but it makes it so fun and fall-ish!!! It's backed with the same. I had to buy muslin for the inside, though.

This tote is large--about 19 inches square, so it's great for grocery shopping! Seriously, if this doesn't sell before/at the craft show in November, I'm going to keep it for myself! I have enough squares for at least one more.


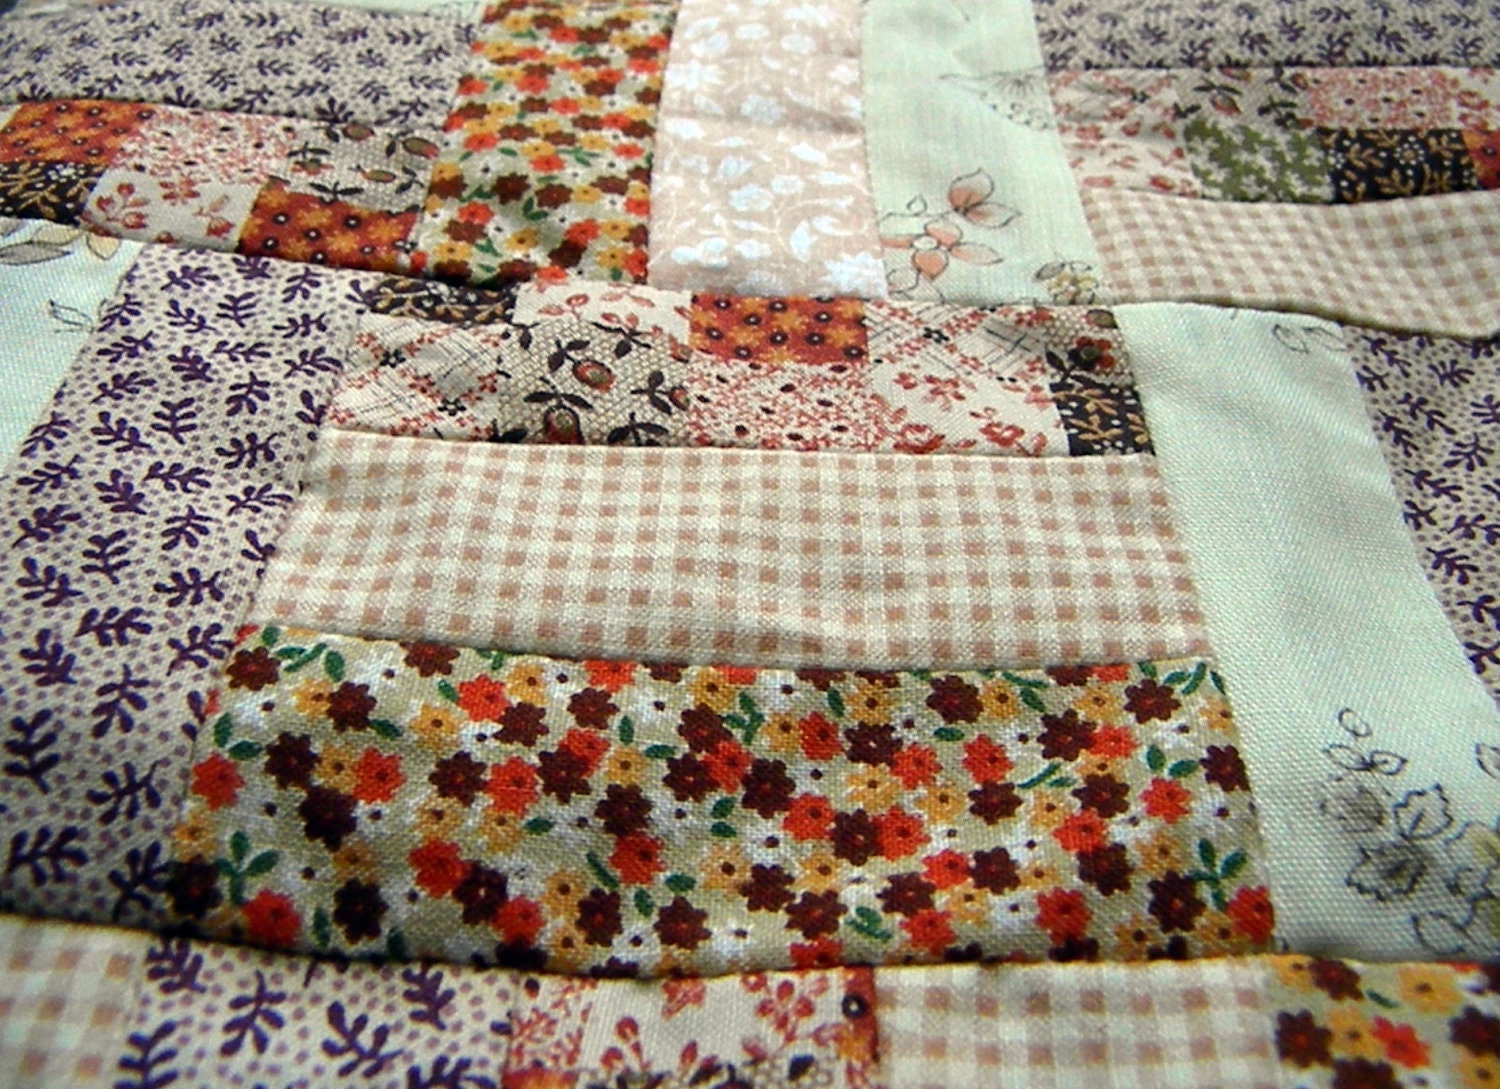
Tote #4: (click here for listing)

This is my favorite!!!!!! It's the most like what I used to make, with fun fabrics everywhere!

I used many of these 6 fabrics in my brown skirt, but I still had a lot left. I found that some had been cut into 3 & 1/2" strips (why did my grandma do that? maybe for a quilt?), so I cut those into these small strips for a log cabin design!

I used the ivory fabric for the back (it has pretty butterflies on it!), and the tan w/ brown leaves for the lining.

This measures about 12" x 9", and I have enough cut for *at least* six bags. Wow--that's a lot! I might make some of them into larger bags--maybe even with quilted pockets!


So, those are the new totes for the week! After I finish more aprons, I'll probably sew up a few more designs :D

Tuesday, October 4, 2011

New Skirts and Future Plans

Several weeks ago, I received friendly critiques on my skirts. My lovely friends said that maybe the "one-size-fits-all" skirts do not actually fit every size.
So, I decided to call those "one-size-fits-most" and add 2 more panels (which is 5-6 inches) to create real "one-size-fits-all" skirts (but, please, if that does not fit someone, please let me know!). Now these skirts fit up to 56" hip (might even fit slightly larger). How exciting!

After running out of muslin for the reversible skirts--and wading through many other sewing and home improvement projects--two of these new skirts are finished!

Dark Blue Lighthouses (click here)
 The Dark Blue Lighthouses skirt has dark blue solid, blue & white gingham check, and tan/blue lighthouse/nautical panels.

Teal Lighthouses & Brown (click here)
The Teal/Brown Lighthouses skirt has ivory solid, brown & white gingham check, and teal boat/lighthouse panels.

Like my other skirts, these are reversible, with simple unbleached muslin on the other side.

Beautiful white crocheted lace is attached to the muslin side, but visible on both sides.


**Now, to FUTURE PLANS!
How about a GIVEAWAY and more frequent blog posts?

That's right, a giveaway. I've been thinking about it for a while, and I really want to go for it!
Pretty sure it will be an apron. Here are my options right now: (if you have opinions, please tell me!)
1) your choice of apron (winner chooses their favorite)
Apron shop section: http://www.etsy.com/shop/StitchPrincess?section_id=6658441

2) I pick an apron to give away (maybe autumn leaves or gingerbread)


3) adult & child apron combo
I'm still finishing the child-size aprons (actually, I still have more adult aprons to churn out, too!), but most of them match the adult aprons and are adorable!

I'm working on finding a heavily-followed blog to host this giveaway, and it will probably be next week :D Be on the lookout!!!


**Last thing: I plan to start blogging more often. Maybe 3-4 times a week, instead of 1-2. I'll do more posts about the processes of my work, reviews of other shops/blogs, new ideas and inspirations.


Any ideas, comments, reactions, recommendations? I love feedback!!!

Thursday, September 22, 2011

Six more aprons . . . yes, six.

It looks like I've been pretty busy this week, with all these aprons! Though, each apron takes about an hour from cutting to final sewing, so it's not as impressive as it looks. lol.
Yellow swirls
These six aprons (and the first from a few days ago) were cut on Sunday and ironed/sewn throughout the week.
Ivory w/ turquoise, brown, and yellow flowers (this is my favorite!)
The ties are VERY long (80" from one tie end to the other, around the waist) and made of bias tape--so they are nice and strong!
Gingerbread men
These are are available on Etsy for $14. Click on the description under each picture for the link :)

Coffee cups
All the fabric was purchased at my favorite Amish fabric store near Goshen, IN :) Love love LOVE that store!!! So many cotton fabrics!
Coffee beans
I have 4 of each of these aprons in stock (except carrots, of which I have 2), and all aprons without black bias tape have matching child-size aprons available (not on Etsy yet, but will be $6).

Carrots
Have an idea for an apron fabric? Want a custom apron for a Christmas gift? Leave a comment! I'll try to find anything you want!
Even more aprons coming soon!!!!!

Tuesday, September 13, 2011

Flowers and Aprons and Pumpkins, Oh My!

Goodness gracious! My Etsy shop has seen so many changes in the past week! On Friday, I began listing digital photography in three categories:
Autumn Photography (click to see it in the shop!)

Flower Photography
Produce Photography
All photos are available for immediate digital download ($3 each) in a high quality JPG format, so anyone can print them in small or large sizes. Also, any can be professionally printed in 2 business days--a 4x6 is $4, a 5x7 is $5.50, and an 8x10 is $8.


AND, I listed 3 aprons this week!


Purple paisley half apron (click to view listing)

This is upcycled from leftover cotton fabric. The ties are long enough to fit any size! (up to 54" waist)


Purple polka-dot half apron (click to view listing)

This is also upcycled from leftover cotton fabric and large enough to fit any size. I had used these fabrics to made a custom-ordered reversible purse. I absolutely love these fabrics!


And a very unique full apron: Wide Smart Apron in Autumn Leaves Print

This has built-in hot pads!!! There is a pocket on the back (it's reversible, by the way).

Since it's made of pre-quilted fabric, the pocket is thick enough to be a pot holder!


I love this idea!


While cooking or baking, you don't have to reach for hot pads; instead, just slip your hands into the pocket!

It's nice and wide, so it will catch any amount of splatter. Pretty nifty apron, huh?